
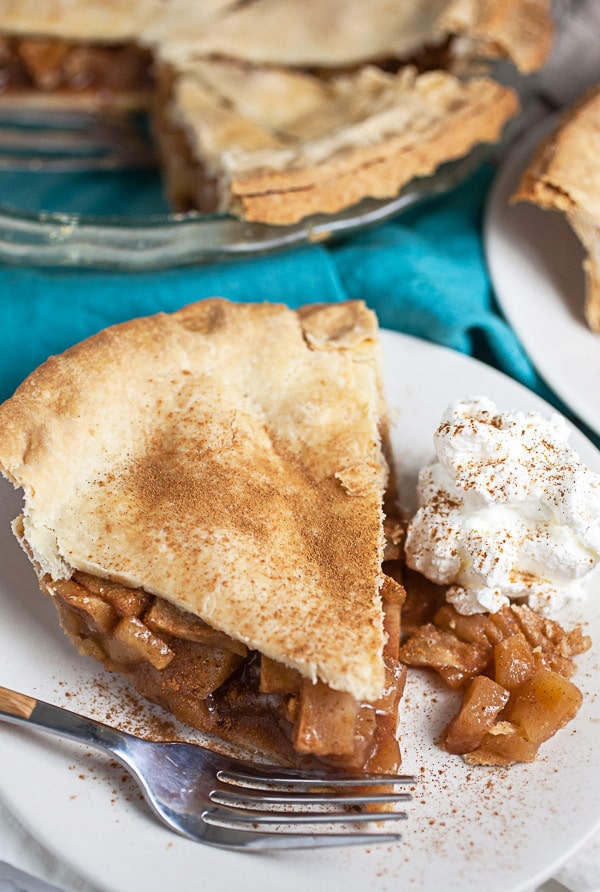
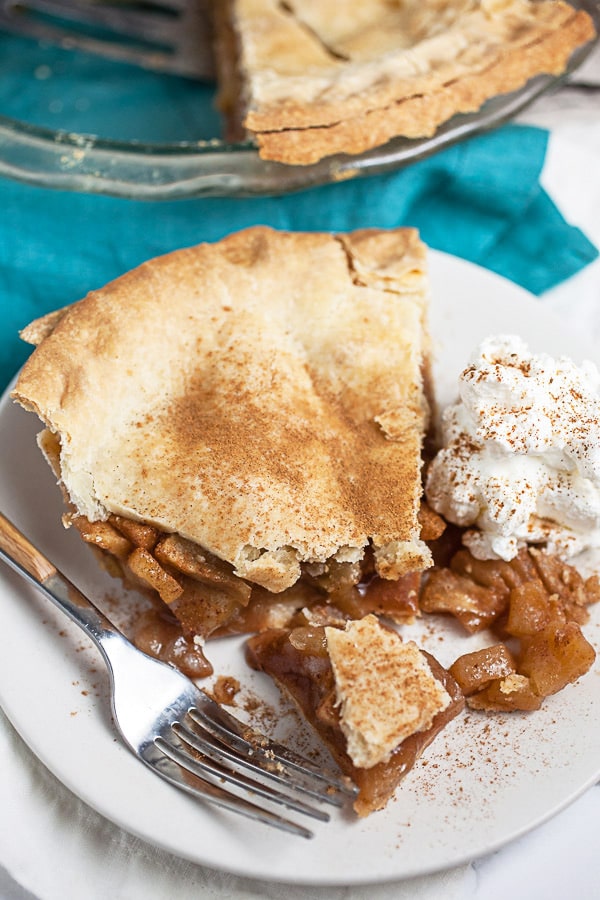
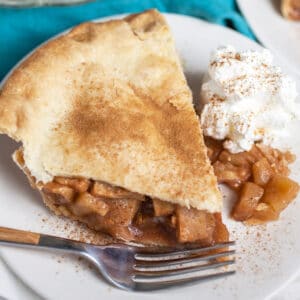
This Gluten Free Apple Pie recipe is the best old fashioned pie made with a homemade crust. It's bursting with apples, cinnamon, and nutmeg!
Normally I'm all about tweaking or experimenting with traditional recipes in order to come up with some 'new' or 'improved' version of it. But then there are those timeless recipes that I just want to remain timeless. This Old Fashioned Apple Pie is one of them.
There are millions of apple pie recipes floating around the internet and scribbled on index cards stuffed into old church cookbooks that are handed down through generations of grandmas and aunts.
No version is really any better than another. They're all delicious. That's because apple pie is classic. There was nothing wrong to begin with and so there's really nothing to 'improve'. I took the 'if it ain't broke, don't fix it' approach with this recipe.
This no-fuss, no-frills version focuses on the basics - A scratch-made crust, fresh apples in season, and just the right amount of spice. Nothing more, nothing less.
Jump to:
- What Are The Best Apples For Baking Pie?
- Do I Need To Peel Apples For Apple Pie?
- How To Make Pie Crust From Scratch
- How To Make Gluten Free Apple Pie From Scratch
- How To Make Apple Pie Filling
- Is It Better To Cook Apple Pie Filling First?
- How To Keep Apple Pie From Becoming Watery
- What Can I Do With Those Extra Pie Scraps?
- How Long Do I Bake Apple Pie?
- How To Bake Pie From Scratch
- Does Apple Pie Need To Be Refrigerated?
- Can Apple Pie Be Frozen?
- Gluten Free Apple Pie
What Are The Best Apples For Baking Pie?
I like to use a combination of tart and sweet apples. The combination of tart and sweet flavors creates a filling that's flavorful and balanced.
It's important not to choose apple varieties that are too soft or the filling may become mushy as it bakes.
The 'go-to' apple for most pies is Granny Smith - This variety provides a tartness that stands up to the sugars in the pie and prevents it from becoming overly sweet.
Granny Smith apples are also firm and don't become mushy when baked.
I love to complement the tartness of the Granny Smith apples with a sweeter variety such as Fuji, Gala, Braeburn, Jonagold, or Honeycrisp.
Do I Need To Peel Apples For Apple Pie?
I normally opt to cook produce with the skins intact (there is nothing better than a batch of Buttermilk Mashed Potatoes with the skins on) and I rarely peel carrots but when it comes to apple desserts it's best to peel the apples before baking.
Leaving the skins on the apples will cause the filling to develop a weird texture and I'm not sure it would taste all the good.
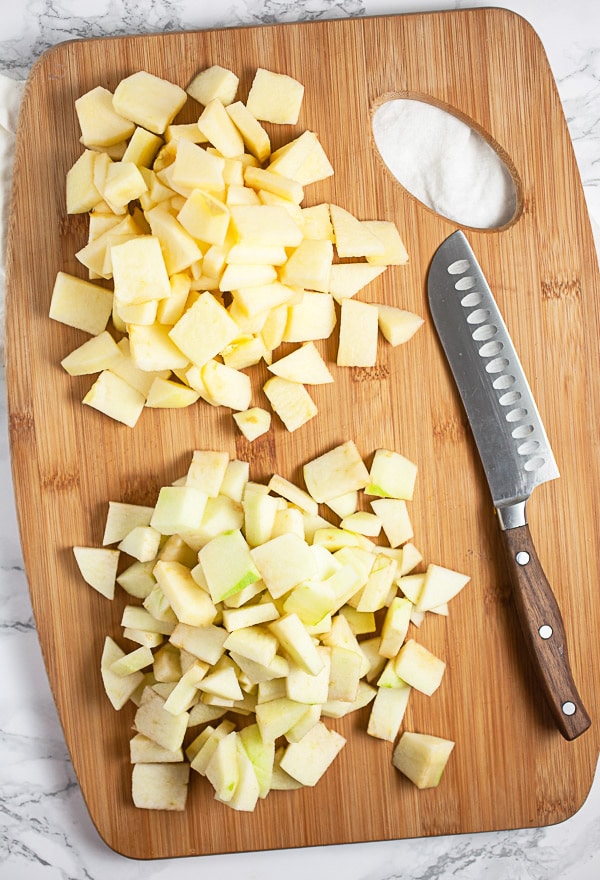
Peel and Dice The Apples
- Completely peel the skins from 6 apples - 3 Granny Smith (or other tart apple variety) and 3 sweeter apples.
- Cut the apples into small slices. It's important that the slices are relatively the same size so the filling cooks evenly.
How To Make Pie Crust From Scratch
The key to a nice rustic, old fashioned pie is a homemade crust.
Pie crust is one of those things that seems intimidating at first and it's true that the process becomes easier the more you do it but I assure you homemade pie dough is TOTALLY do-able (and so rewarding when you take that first bite).
I first published this post a few years ago when gluten was still very much a part of my diet. The recipe has been updated and is now gluten free but I have prepared it both ways and will provide directions for each.
To prepare the gluten free pie dough for this Apple Pie follow this recipe - How To Make Gluten Free Pie Crust. It will provide you with step-by-step instructions for baking a gluten free crust that's every bit as delicious as a regular one.
That gluten free pie crust recipe is GREAT to have on hand during the holiday season if you are serving guests that are gluten free (and don't want them to stare sadly while all your gluten eating guests happily scarf down their homemade piece of pie).
If you would like to follow a traditional pie dough recipe and don't have a problem with gluten follow this recipe - How To Make Homemade Pie Crust.
Once you get the hang of it the process of rolling out pie dough is actually pretty fun (messy, but fun). The most important thing to remember is that pie crust does NOT have to be perfect. Pie is meant to be rustic, not perfect.
How To Make Gluten Free Apple Pie From Scratch
Once the pie dough has been prepared and is chilling in the fridge it's time to make the filling.
I like to do this by tossing everything into a large bowl and mixing it together with a large spoon.
How To Make Apple Pie Filling
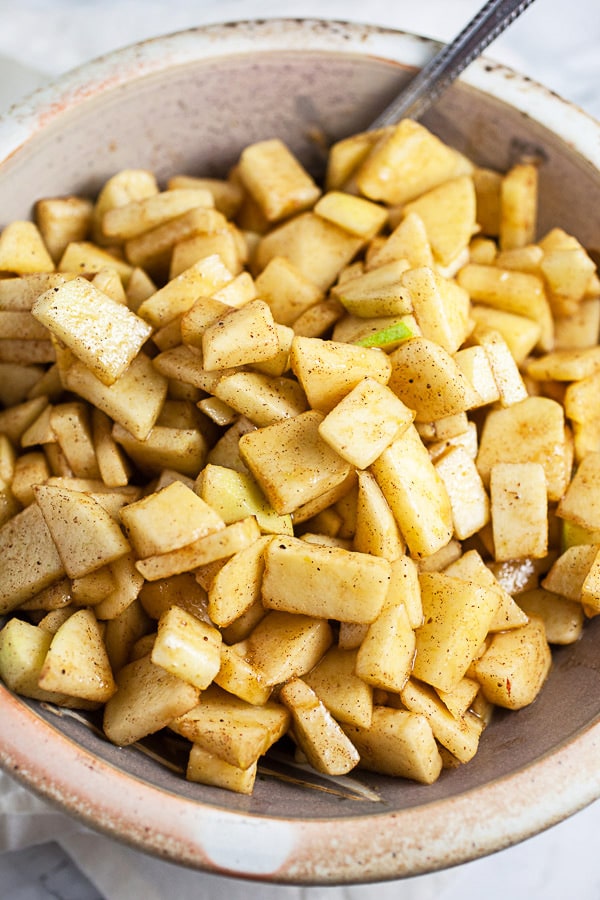
- Place all the sliced apples (both the sweet and tart) into a large bowl and add 2 heaping Tbsp. of lemon juice (be careful not to get any seeds in the bowl) 1 ¼ packed cup of brown sugar (or dark brown sugar) 3 tsp. cinnamon, ½ tsp. nutmeg, 3 Tbsp. gluten free flour blend (or AP flour if not gluten free), and a pinch of kosher salt.
- Mix all of the ingredients together. The apples will start to macerate in the brown sugar. This means that the sugar will draw some of the liquid out of the apples.
A Note About The Filling
This recipe is written to fill a 9″ pie dish. If you are using a deep-dish pie plate you may need to double the amount of filling in order to have enough to accommodate the deeper dish.
Is It Better To Cook Apple Pie Filling First?
Once the filling has been prepared it's time to roll out the pie dough. This is a double crust pie meaning that both pie crusts will be used to make one pie - One of the crusts will hold the filling and the other is placed on top and the two crusts are crimped together with a fork.
It is not necessary to bake the apple pie filling before adding it to the crust. Baking the filling first would result in the apples becoming mushy.
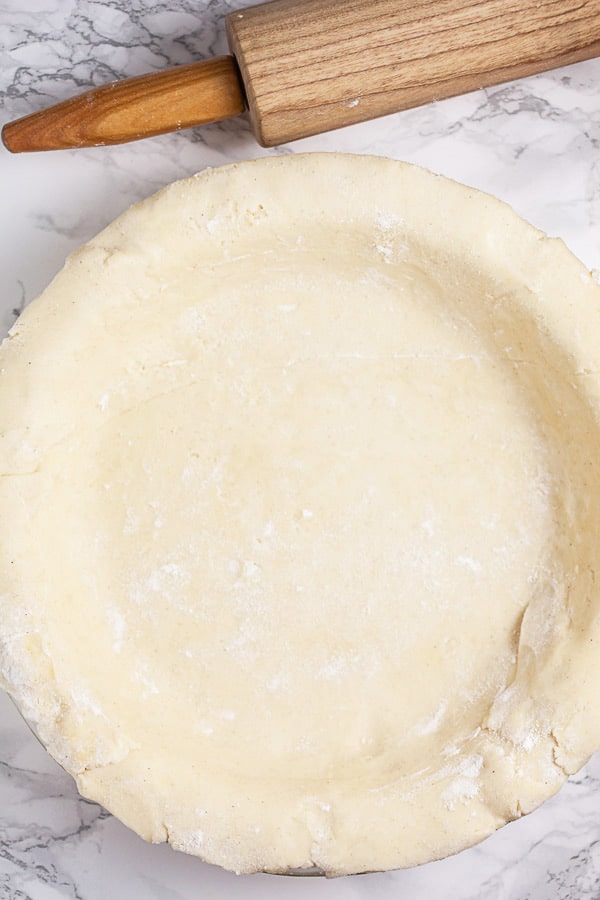
- Remove the prepared pie crusts that have been chilling in the fridge.
- Roll out the two pie crusts with a rolling pin.
- Place one of the crusts in a 9-inch pie dish ( Trim the edges if there's tons of dough hanging over the sides).
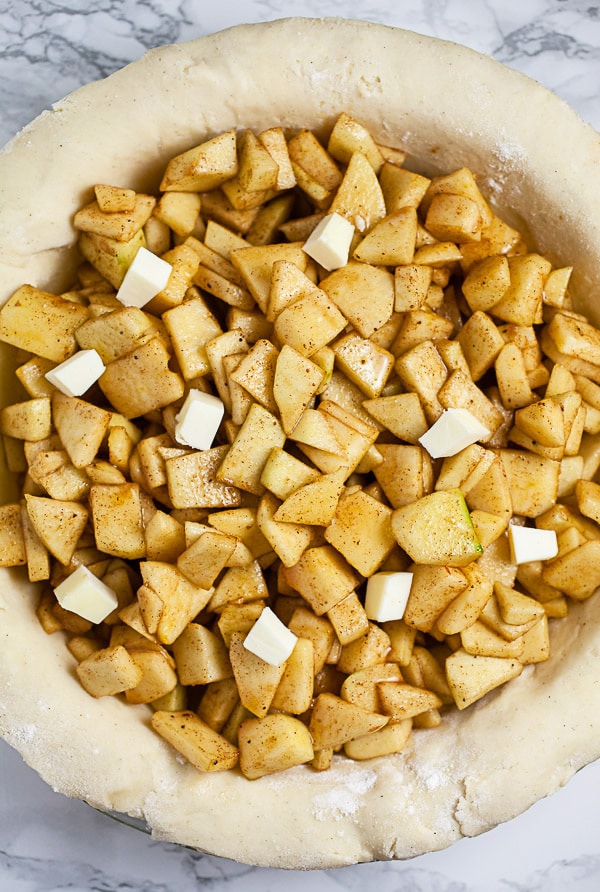
- Using a slotted spoon place the apple filling into the pie dish. The slotted spoon will help to get the filling into the dish without all the extra juices from the apples. Those sugary juices are delicious but will cause the pie filling to become watery.
- Cut 1 Tbsp. of butter into small pies and dot the top of the filling with it.
How To Keep Apple Pie From Becoming Watery
Adding the flour to the filling will help to thicken it as it bakes in addition to leaving out those extra juices from the apples.
What Can I Do With Those Extra Pie Scraps?
Place any extra pie crust trimmings in a pie plate and sprinkle with cinnamon and sugar. Bake for 12-15 minutes for a 'pre-pie' treat!
How Long Do I Bake Apple Pie?
Baking times for this (or any pie for that matter) may vary slightly depending on your oven, the altitude at which you live, or the type of pie plate you are using.
A good starting point for this recipe is 60 minutes. Mine took a total of 1 hour and 15 minutes but it may be slightly different for you.
- Preheat the oven to 400 degrees Fahrenheit.
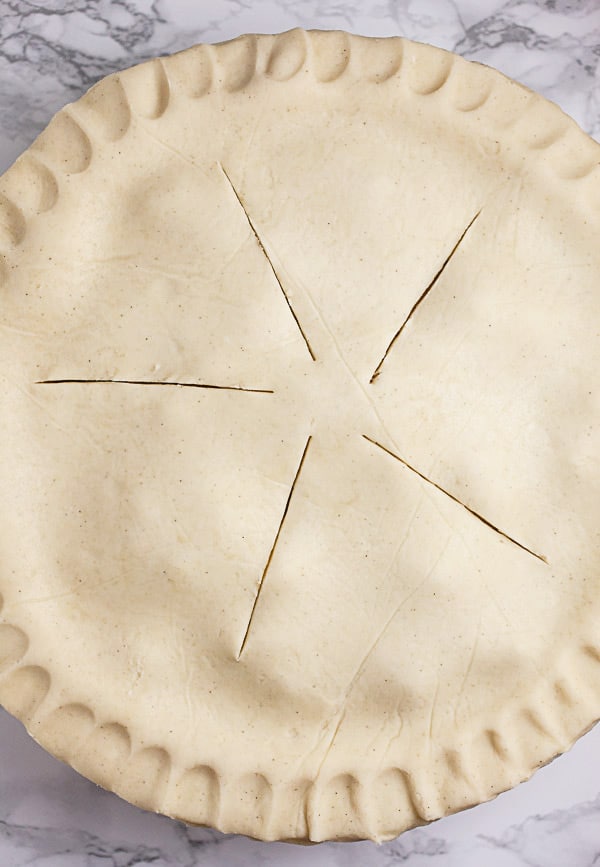
- Place the second crust on top of the filled bottom and crimp the edges together (this can be done with your fingers or a fork). You can get as fancy as you like with the crimped edges. Feel free to cut little leaf designs with the extra crust and attach them to the top. You can make a lattice top. I'm a total perfectionist but NOT when it comes to pies. No fancy shapes or designs for me. I like to press it together and call it good.
- The last step is to cut 4-5 slits on the top of the pie with a knife. This will allow some of the steam to escape.
How To Bake Pie From Scratch
- Loosely cover (or tent) the pie with a piece of tinfoil (large enough to cover the pie) and place the pie in the oven. The tinfoil will prevent the edges of the pie from burning and will help the top crust cook more evenly.
- Bake for 1 hour and 15 minutes at 400 degrees Fahrenheit.
- Place an extra baking sheet on the rack below the pie to catch any spills as it bakes.
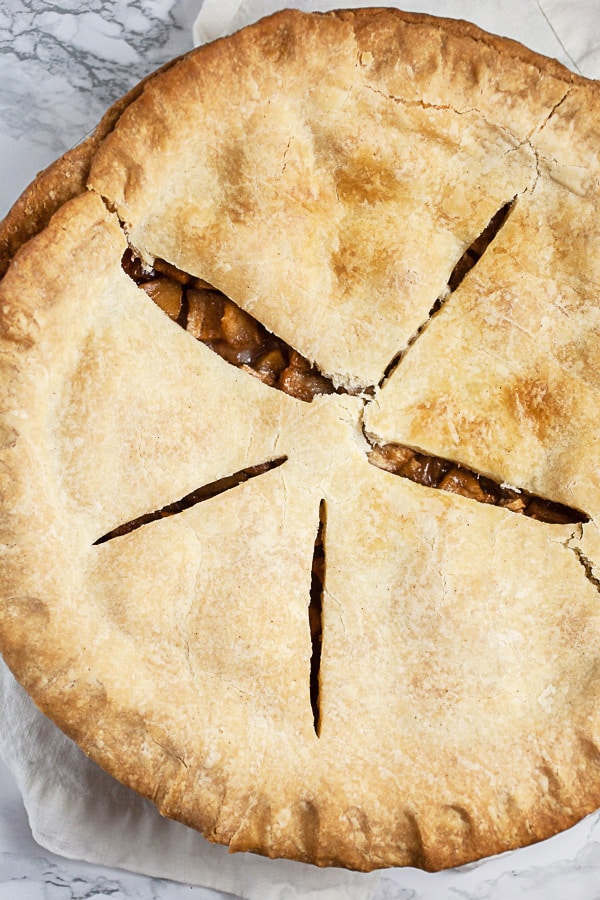
- Remove the foil at the 45 minute mark and rotate the pie so it bakes evenly (it's OK if the edges brown at the end of the baking process).
- Check the pie at the end of the cooking time. The top should be golden brown and the apples should be easily pierced with a knife. The apples should be soft, but not mushy.
After the crust is golden and the filling is soft and bubbly remove from the oven and set aside to cool for at least 2 hours.
Does Apple Pie Need To Be Refrigerated?
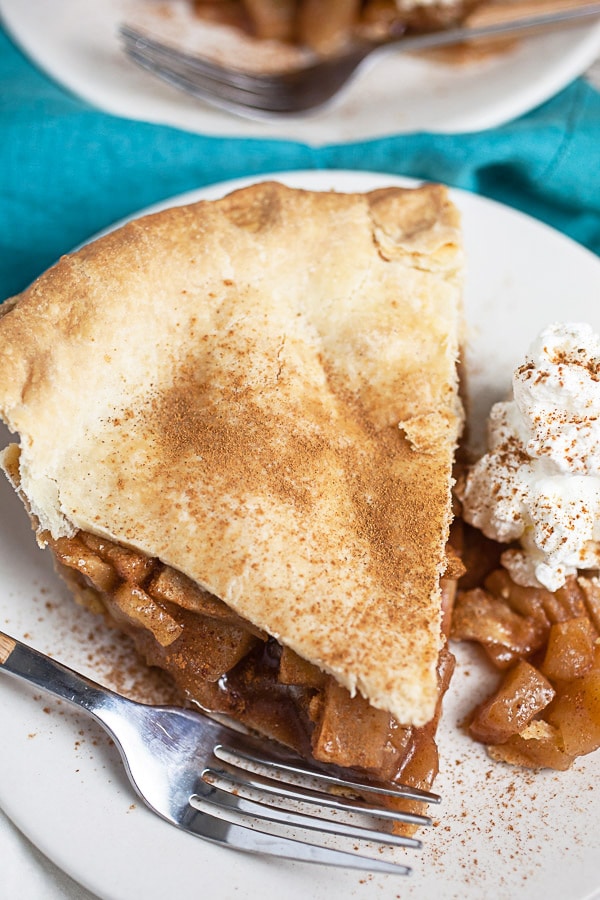
Once the Gluten Free Apple Pie has cooled enough to eat cut yourself a slice and enjoy. Pies like this really are one of life's simple pleasures.
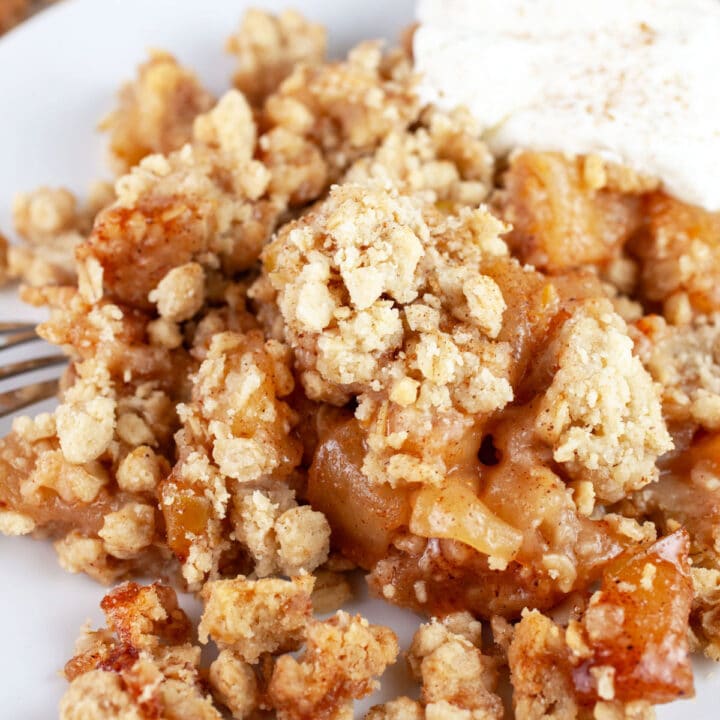
You can serve it with whipped cream or ice cream if you like. I'm one of those weirdos who doesn't really like ice cream with pie so all I need is a cup of coffee and I'm set.
This pie should last 3-4 days at room temperature. I recommend covering it with a towel if you're going to keep it on the counter top so the crust doesn't dry out.
You can certainly store it in an airtight container in the refrigerator for 3-4 days if you like but it's not necessary.
Love old fashioned desserts? Don't miss these recipes!
- Blueberry Buckle
- Buttermilk Bread Pudding
- Crispy Sugar Cookies
- Peanut Butter Blossoms
- Scandinavian Almond Cake
Can Apple Pie Be Frozen?
Gluten Free Apple Pie can be made ahead of time and frozen.
How To Freeze
- Bake the pie as directed and allow to cool completely before freezing. Make sure to use a freezer-to-oven safe baking dish if freezing this pie - Avoid storing the pie in glass or Pyrex dishes in the freezer as they may shatter with the temperature.
- Wrap the pie tightly with plastic wrap and place in a heavy-duty freezer bag and store up to 3 months.
- Defrost by placing the pie in the freezer overnight the day before serving or leave at room temperature for an hour or two.
- Unwrap and place the pie in a 350 degree Fahrenheit oven for 15-20 minutes to warm before serving.
Love pies? Check out this Maple Bourbon Pecan Pie and Maple Walnut Pie!
Looking for more apple desserts? Don't miss these!
- Cast Iron Apple Crisp
- Buttermilk Apple Cake
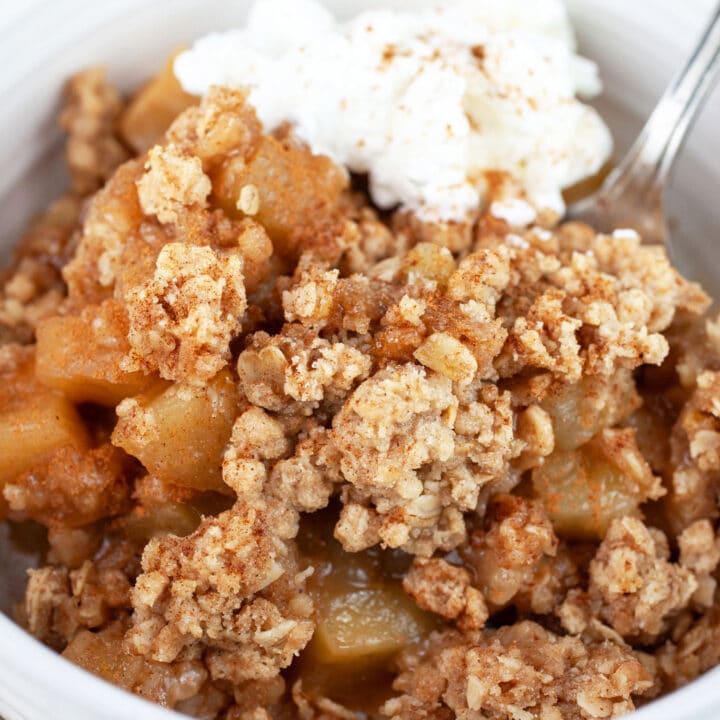
- Gluten Free Apple Crisp
- Rustic Apple Galette
- Sour Cream Streusel Apple Muffins
Love fall desserts? Check out these recipes!
- Pumpkin Bread Pudding
- Pumpkin Coffee Cake
- Maple Walnut Baklava Bites
- Pumpkin Panna Cotta
- Gluten Free Pumpkin Scones
Looking For More Apple Desserts? Don't Miss These!
Norwegian Apple Cake
Apple Tart with Meringue Topping
Apple Cinnamon Muffins with Streusel Topping
Apple Pecan Cream Cheese Cake
Apple Dumplings
Gluten Free Apple Pie
Equipment
Ingredients
- 3 large tart apples such as Granny Smith, yields 3 cups
- 3 large sweet apples such as Braeburn, Fuji, or Gala, yields 3 cups
- 1 ¼ packed cups light brown sugar or dark brown sugar
- 2 Tbsp. lemon juice
- 3 Tbsp. gluten free flour blend or AP flour if not gluten free
- 3 tsp. cinnamon
- ½ tsp. nutmeg
- pinch kosher salt
- 1 Tbsp. unsalted butter
For The Pie Crust:
- 3 cups gluten free flour blend or AP flour if not gluten free
- 2 sticks unsalted butter
- 2 large eggs
- ½ cup cold water
- 2 tsp. apple cider vinegar
Instructions
Prepare The Pie Dough:
- Prepare the pie dough. If gluten free use this recipe for How To Make Gluten Free Pie Crust and if not gluten free use this recipe for How To Make Homemade Pie Crust. Chill the pie dough in the fridge according to recipe instructions.
- When making this pie gluten free, it's important to par-bake the bottom crust first, but it is not necessary to par-bake the top crust. First, par-bake the bottom crust, allow to cool, add the fillings, and then add the top crust (without par-baking), cut some air vents, and crimp the edges. The pie is now ready to bake.When making this pie with AP flour, it is not necessary to par-bake the bottom or top crusts.
- Preheat oven to 400 degrees Fahrenheit.
- Completely peel the skins from 6 apples - 3 Granny Smith (or other tart apple variety) and 3 sweeter apples.
- Cut the apples into small slices. It's important that the slices are relatively the same size so the filling cooks evenly (yields 3 cups each of tart and sweet apples).
For The Filling:
- Combine all of the sliced apples, 1 ¼ packed cups brown sugar (or dark brown sugar), 2 Tbsp. lemon juice (careful not to get any seeds in the filling), 3 Tbsp. gluten free flour blend (or AP flour if not gluten free), 3 tsp. cinnamon, ½ tsp. nutmeg, and a pinch of kosher salt in a large bowl. Stir until completely combined. (The apples will start to macerate and form a sugary liquid as they sit).
- Remove the prepared pie crusts that have been chilling in the fridge. Roll out the two pie crusts with a rolling pin. Place one of the crusts in a 9-inch pie dish ( Trim the edges if there's tons of dough hanging over the sides).
- Using a slotted spoon place the apple filling into the pie dish. The slotted spoon will help to get the filling into the dish without all the extra juices from the apples. Those sugary juices are delicious but will cause the pie filling to become watery.
- Cut 1 Tbsp. butter into small pieces and dot the top of the filling with it.
- Place the other crust on top of the filling. Crimp the edges of the pie together with your fingers or a fork until it is sealed.
- Cut 4-5 slits in the top crust to allow the steam to escape while baking.
- Cover (or tent) the pie with a piece of tinfoil (large enough to cover the pie) and place the pie in the oven. The tinfoil will prevent the edges of the pie from burning and will help the top crust cook more evenly.Place a baking sheet on the rack below the apple pie to catch any drippings as the pie bakes.
- Bake for 1 hour and 10-15 minutes at 400 degrees Fahrenheit. Remove the foil at the 45 minute mark and rotate the pie so it bakes evenly (it's OK if the edges brown at the end of the baking process).Keep in mind that cooking times may vary slightly.
- Check the pie at the end of the cooking time. The top should be golden brown and the apples should be easily pierced with a knife. They should be soft, but not mushy.
- Remove pie once it's done and set aside to cool for at least 2 hours.
- To Serve: Serve pie with whipped cream or ice cream (optional).

geet
wonderful recipe! thanks for sharing this. will surely try this out.
Christine
Awesome - I hope you enjoy!
Dave Clark
Thanks Christine,
Grandma's magic crust is now demystified, keeping it simple, yet delicious is a true gift you so elegantly share! I'm salivating waiting for the oven to preheat. Happy memories of Gram Dunn busily tending to the details of dinner from her wood cook stove; the boy relegated to the stool to watch and lick the spoon. Like a sorcerer's apprentice, eye's wide with amazement, stay back or you'll get burned. She hands me a slice of sharp cheddar to layer on top the pie's slice, before the scoop of hand churned vanilla melts atop the warm pie; Pure Bliss!!! Thanks for the recipe and reminiscent journey to a happy, happy, happy place!
Christine
Best comment ever.
Cheryl
Yum! Looks good! I love apple pie but not the peeling and the slicing so I usually swing towards the easier prep of berry pies. But I do love apple pies!
Christine
It definitely is a bit of work but so worth it! 🙂
Deb Stegman
Looks delicious, you make me want to start fall baking!! Thanks for sharing!
Christine
We've still got to make lefse one of these years!
Ben Myhre
I agree that errbody (or anybody that likes cooking) should try to make there own pie crust... if anything, for the experience. I have an apple try in my yard and have made all sorts of pies, sauce (which IS a pain in the butt), and even hard cider from it. Good stuff.
Christine
I'm so jealous - You're super lucky to have your own apple tree!
Kelly Asche
Damn tasty pie.
Karly
Yesss! I swear, I can smell it already. There's nothing that makes my heart fill all the way up like a warm slice of apple pie on a fall day. Perfection!
Christine
Especially with a cup of coffee!
Analida Braeger
When the oven is on and the house is filled with that aroma! Pure heaven! I can't wait to try your recipe!
Christine
So true - There is nothing better!
Michelle
You are so right! There is nothing better than a classic homemade apple pie! I also find making my own pie crust a little intimidating. I'll give this recipe a try. Practice makes perfect right? Thank you for sharing.
Christine
It totally just takes a little practice. It's actually pretty fun once you get the hang of it!
Aish Das-Padihari
I like everything and anything old fashioned. This old fashioned apple pie sounds super delish. Thanks for the great idea.
Christine
Me, too! Old fashioned stuff is the best.
Cindy
Sounds just like my Mom's recipe. I will definitely try this recipe.
Christine
Awesome - Let me know how it turns out, Cindy!
Elaine @ Dishes Delish
This recipe looks so delicious. It reminds me of my grandmother's apple pie! And you are right, if it isn't broke, don't fix it!! I can't wait to try this.
Christine
Grandmas always make the best pies!
dixya @food, pleasure, and health
im so with you on rustic,good old recipes. some things should be just left alone 🙂
Christine
It's nice to know that some things in life don't have to change. 🙂
Nicoletta @sugarlovespices
I am so with you on not wanting to change anything about timeless recipes like this! There is really nothing else to improve. Your apple pie looks magnificent and I like it like that as well, no fancy adds on, just the slits on top for ventilation (and they look so pretty)!
Christine
I'm totally in awe of those people who have the patience to make fancy pie-designs. I like to take the rustic approach because that means I can eat it faster!
Cheryl
Yum, I love a great classic apple pie. And I really like the way you cut the apples. I typically cut them in slices.
Christine
It does take a little bit of time but definitely worth it!
Anne Murphy
I love your approach!
Years ago I was able to go apple picking every Fall, and would come home with a bushel or more of apples! Apple chutney, applesauce, apple butter, and about 15 versions of apple pie... you really can't go wrong. And yes - the classic, basic one is finally the best - nothing getting in teh way of the apple flavor.
Christine
That sounds like so much fun!
Kate
Oh my gosh, yum! Who love a good old fashioned apple pie?!
Christine
Right?!
Veena Azmanov
So true.. Ain't nothing better than good old Homemade Apple Pie. Always a winner on our dessert table. I love making my own pie crust but often have to rely on store bought for a quick fix
Christine
Store bought pie crusts are definitely a time saver!
Erin @ The Speckled Palate
Like you, I'm all for changing and tweaking recipes to make them different... but there's something about a classic remaining the same. And this Rustic Old Fashioned Pie looks absolutely FABULOUS. Seriously. I want to get my hands on a slice and dive right on in!
Christine
I had to share with the neighbors so I didn't eat the entire thing! 🙂
Amanda Mason
There is nothing better than apple pie, especially a homemade one! YUM!! This looks and sounds delish!
Christine
You really can't beat it!
Çitra Kale @Çitra's Home Diary
The crust looks perfect! and the filling...Looovvee it! . you made wonderful apple pie. İt's on my bookmark now. thx for sharing Christine
Christine
Thanks so much - I hope you enjoy!
Reena Bansal
Perfect way to make a quick dessert with no stuff you have at home. Tasted amazing.
I split the slab in half (so made 2 pies) same time and temp and worked perfectly
Christine
Hi, Reena - So glad it worked out and thank you for sharing! 🙂
Bob
FINALLY someone made a comment on how the pie TASTED and not the pictures!
Will try it out now
Thank you Reena Bansal!!!
Bob
Of course you would delete honest messages and only put what you want others to see
Christine
Hi Bob - I actually approve all comments as this helps me to create the best content possible. I feel that all comments (positive and negative) provide value to other readers and to me as a recipe creator.
John Trotter
Hello Christine,
All your recipes just look so great and I bet they taste great as well. I will be trying them soon.
I noticed you make no mention of adding xanthan gum to your recipes. This helps gluten free flour to react like normal by giving it a bit stretch to baked goodies. Have you ever used it? Just wondering.
John in Australia.
Christine
Hi John - I try to keep things as simple as possible and usually use Bob's Red Mill 1 to 1 Flour which contains xantham gum. I love to test out new ingredients, though, and will give it a try sometime! Thank you for the recommendation - I'm looking to start making gluten free pizza dough which definitely needs all the stretch it can get!