
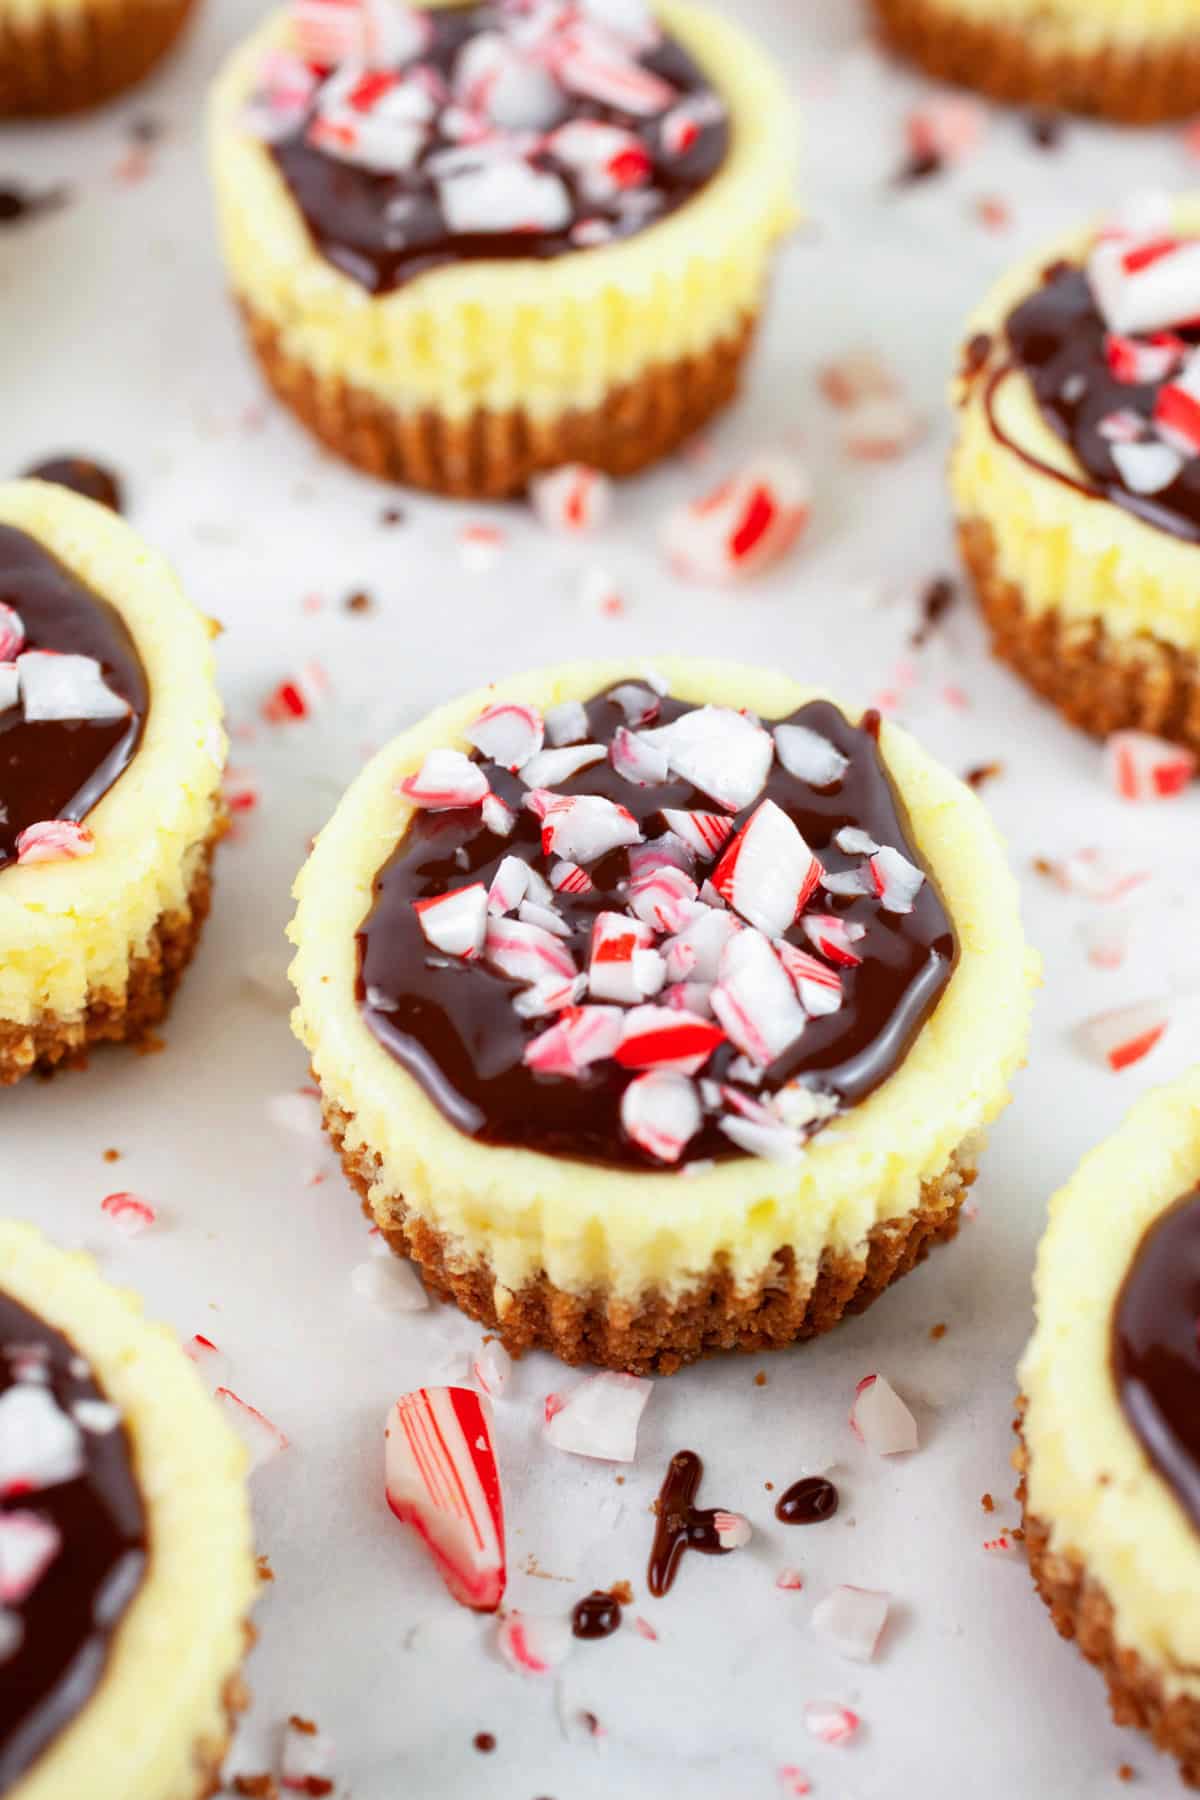
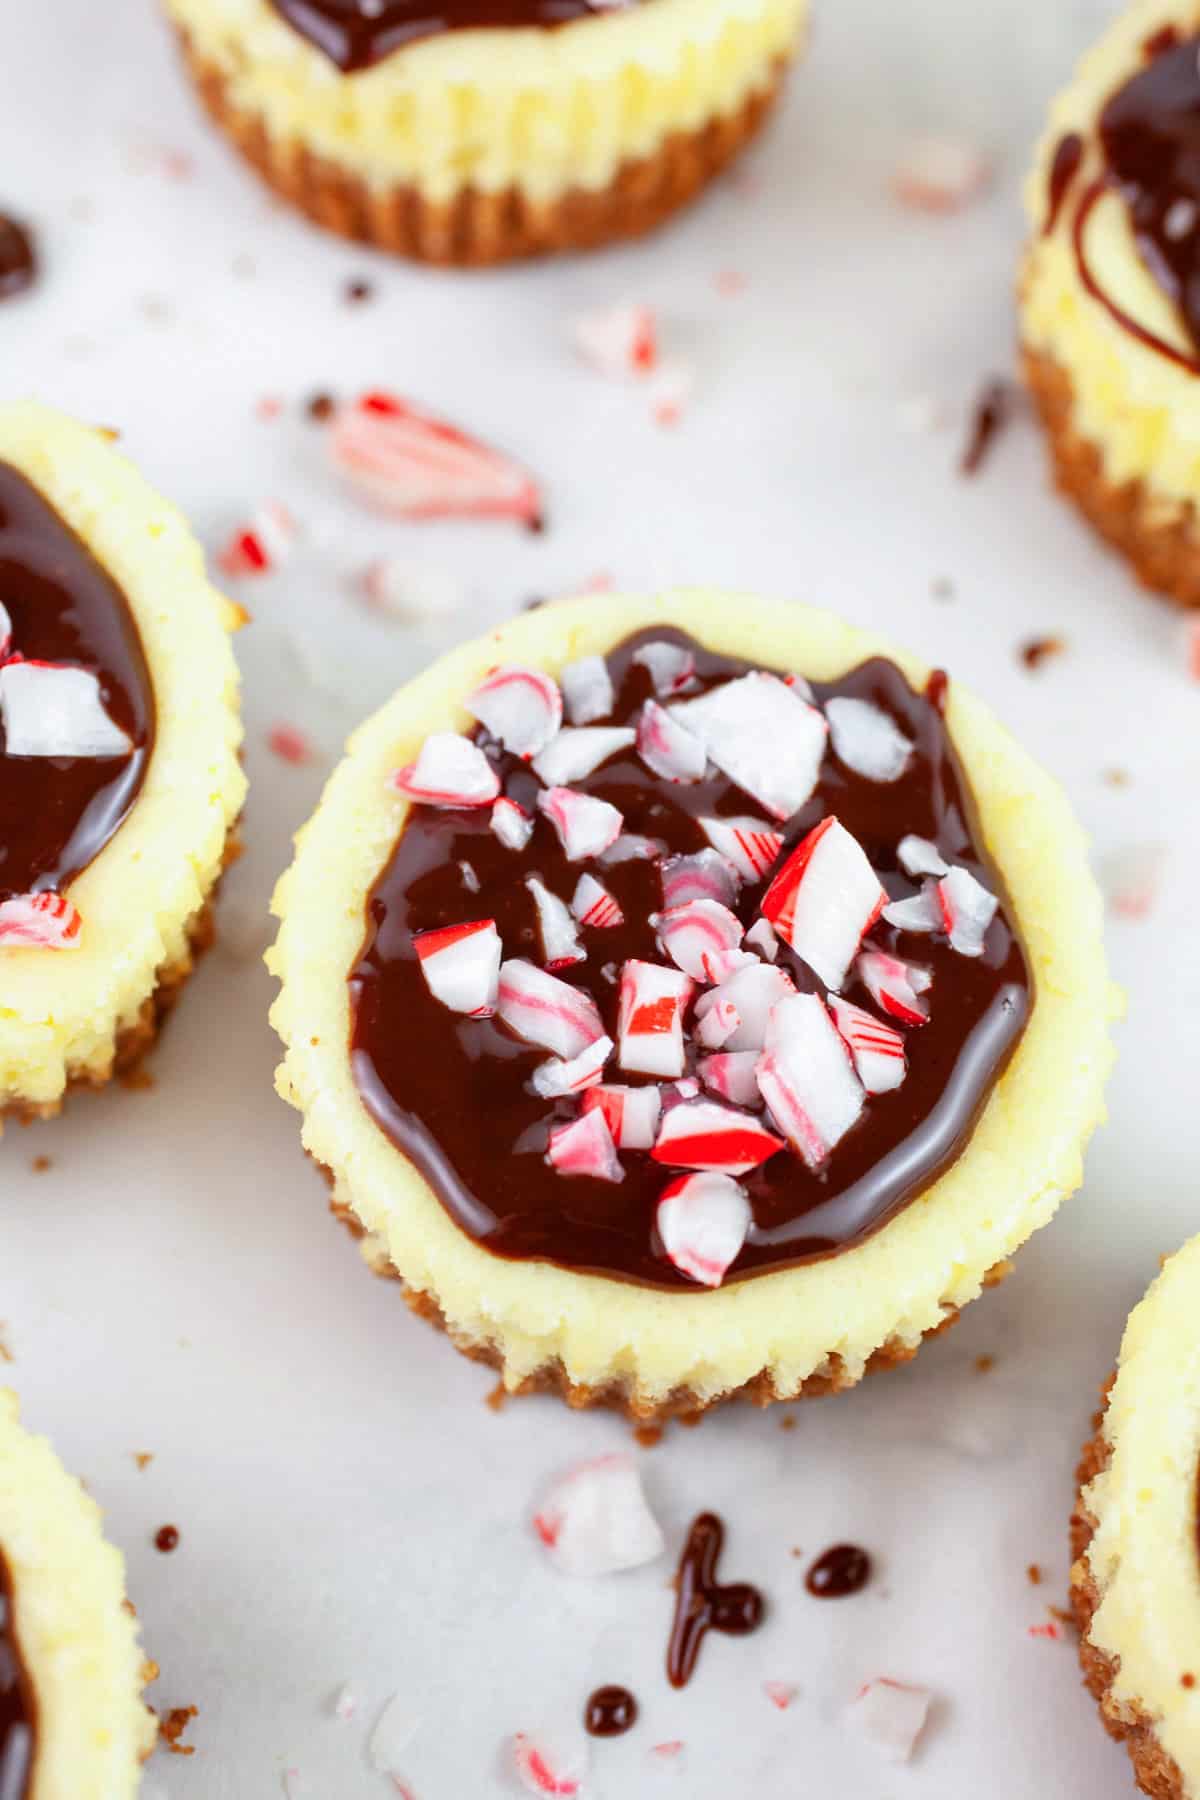
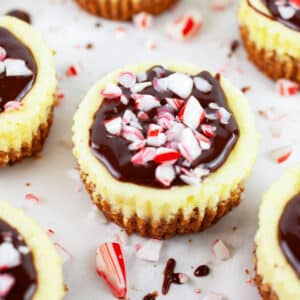
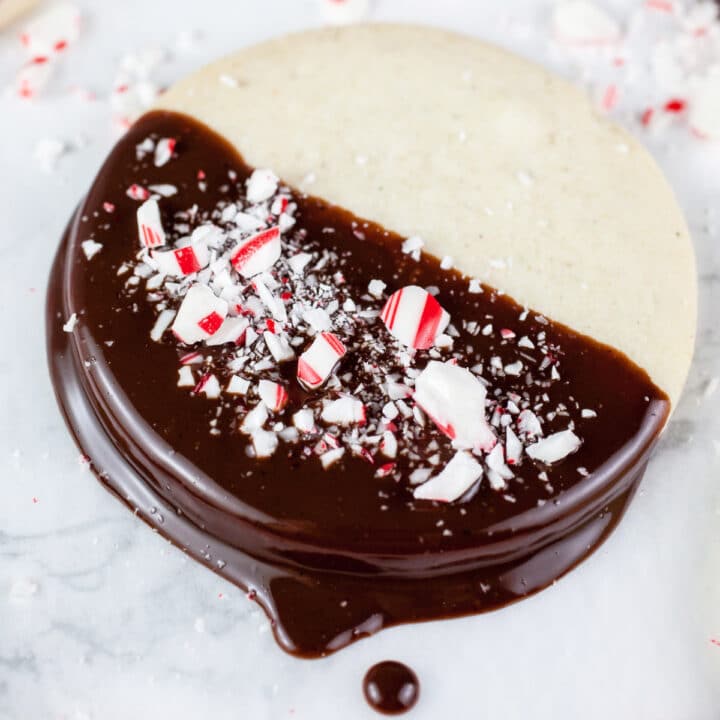
These gluten free Peppermint Cheesecake Cups are a festive Christmas dessert! They're topped with chocolate ganache and crushed candy canes.
These Peppermint Cheesecake Bites are creamy, decadent, and completely irresistible. They'll put you right in the holiday spirit!

Peppermint and chocolate is the ultimate Christmas flavor combo. There are any number of desserts that celebrate the use of these two flavors and I'm pretty sure that all of them are delicious.
These cheesecake cups are great for holiday parties because they're bite-sized, which means that they're portable and make the perfect addition to a holiday buffet table. Your guests can enjoy one or as many as they like.
This recipe is made with a cream cheese filling that's flavored with peppermint extract and poured into muffin tins and baked just until set. The base of these cheesecakes is made with a graham cracker crust. It provides a crunchy and slightly salty texture that complements the sweetness of the filling.
These mini cheesecakes are drizzled with a chocolate ganache topping and crushed peppermint candies. The peppermint candy gives them a little extra crunchy texture and burst of peppermint flavor.
Jump to:
- Which Gluten Free Graham Crackers Are Best For Cheesecake?
- Ingredients For Peppermint Cheesecake Cups
- How To Make Graham Cracker Crust
- Prepare The Graham Cracker Crusts
- How To Make Peppermint Cheesecake Filling
- How Long Do Cheesecake Cups Take To Bake?
- How Long Do Cheesecake Cups Need To Cool?
- How To Make Chocolate Ganache
- How To Garnish Cheesecake Cups
- What To Serve With Peppermint Cheesecake Bites
- How Long Do Cheesecake Cups Last?
- Can They Be Frozen?
- Peppermint Cheesecake Cups
Which Gluten Free Graham Crackers Are Best For Cheesecake?
Like many cheesecake recipes, these cheesecake cups are made using a graham cracker crust. However, this recipe is gluten free and calls for gluten free graham crackers.
Graham crackers are not gluten free, but there are a lot of great gluten free graham crackers on the market today. All that's needed to make cheesecake crust gluten free is to choose your favorite brand of gluten free graham crackers.
Feel free to use any brand of graham crackers if gluten is not an issue for you.
I used Schar Honeygrams to make these Peppermint Cheesecake Cups and was super happy with the results.
Here are some other great gluten free graham cracker brands:
- Pamela's Honey Grahams
- Kinnikinnick S'moreables
- Partake Classic Grahams
Ingredients For Peppermint Cheesecake Cups
Here's what you'll need to make them.
- 3 cups (equals 11.5 oz.) Gluten Free Graham Crackers (crushed) or regular graham crackers if not gluten free
- ¾ cup plus 2 Tbsp. Sugar (split)
- ¼ tsp. Kosher Salt
- 6 Tbsp. Unsalted Butter
- 2 8 oz. blocks Cream Cheese (full fat)
- 1 cup Sour Cream (full fat)
- 4 Eggs
- 2 ½ tsp. Peppermint Extract
- 1 cup Semi-Sweet Chocolate Chips
- ¾ cup Heavy Whipping Cream
- ¼ tsp. Instant Coffee (optional)
- ½ cup Peppermint Candies (such as candy canes) (crushed)
This recipe yields 24 cheesecake cups. Feel free to cut the recipe in half if needed. Cutting the recipe in half will yield 12 cheesecake cups.
How To Make Graham Cracker Crust
The great thing about graham cracker crust is that it's extremely easy to prepare.
All that's needed to make it are some graham crackers that are pulsed in a food processor and then combined with sugar, kosher salt, and some melted butter.
The mixture is mixed until combined and then spooned into a muffin tin lined with cupcake liners.
If you do not have a food processor, simply place the graham crackers into a Ziploc bag and roll over the bag with a rolling pin. Alternately, you can hit the graham crackers lightly with the rolling pin or a meat mallet until they reach your desired consistency.
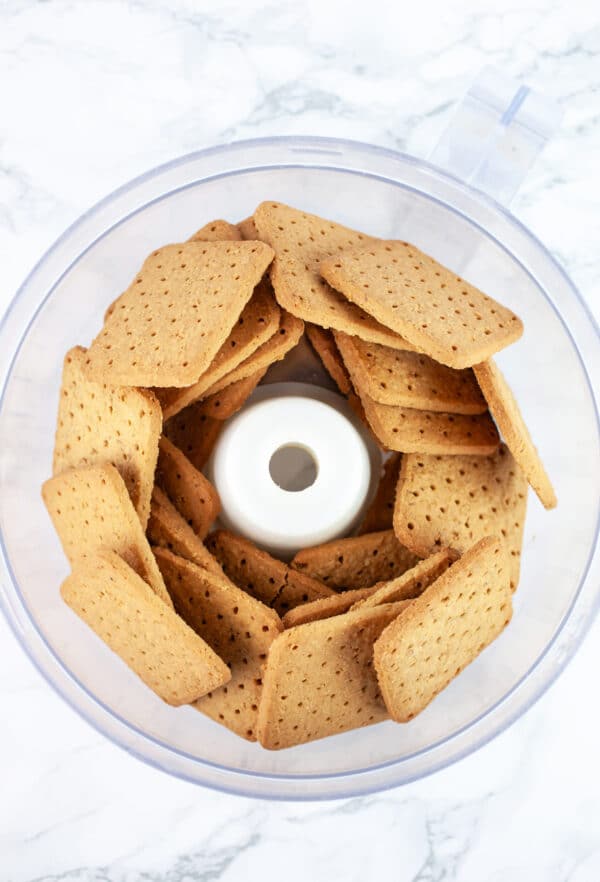
- To make the crust, place 11.5 oz. of gluten free graham crackers (or regular graham crackers if not gluten free) (this equals about 3 cups of graham crackers) into a food processor.
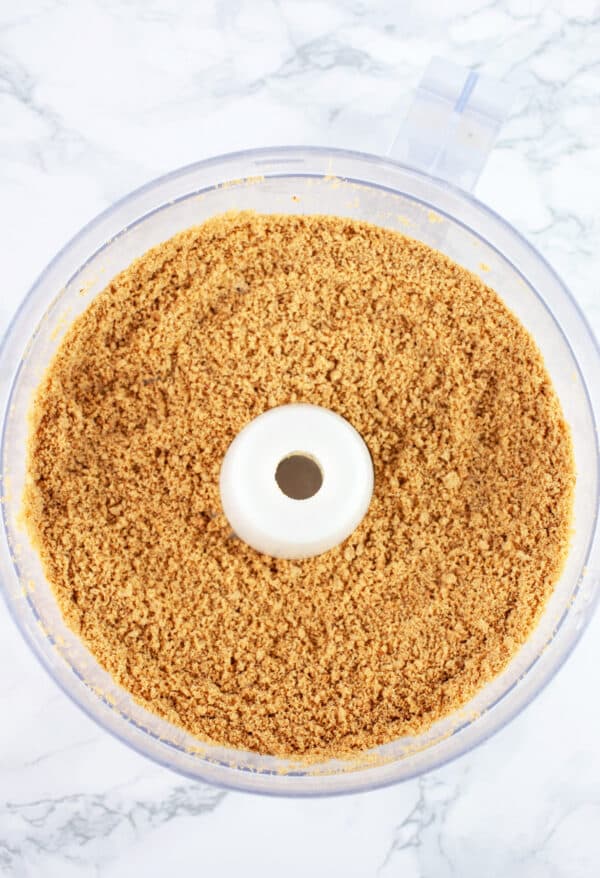
- Place the lid on the food processor and pulse the graham crackers until the texture resembles coarse crumbs.
- Remove the pulsed graham crackers and place them into a mixing bowl.
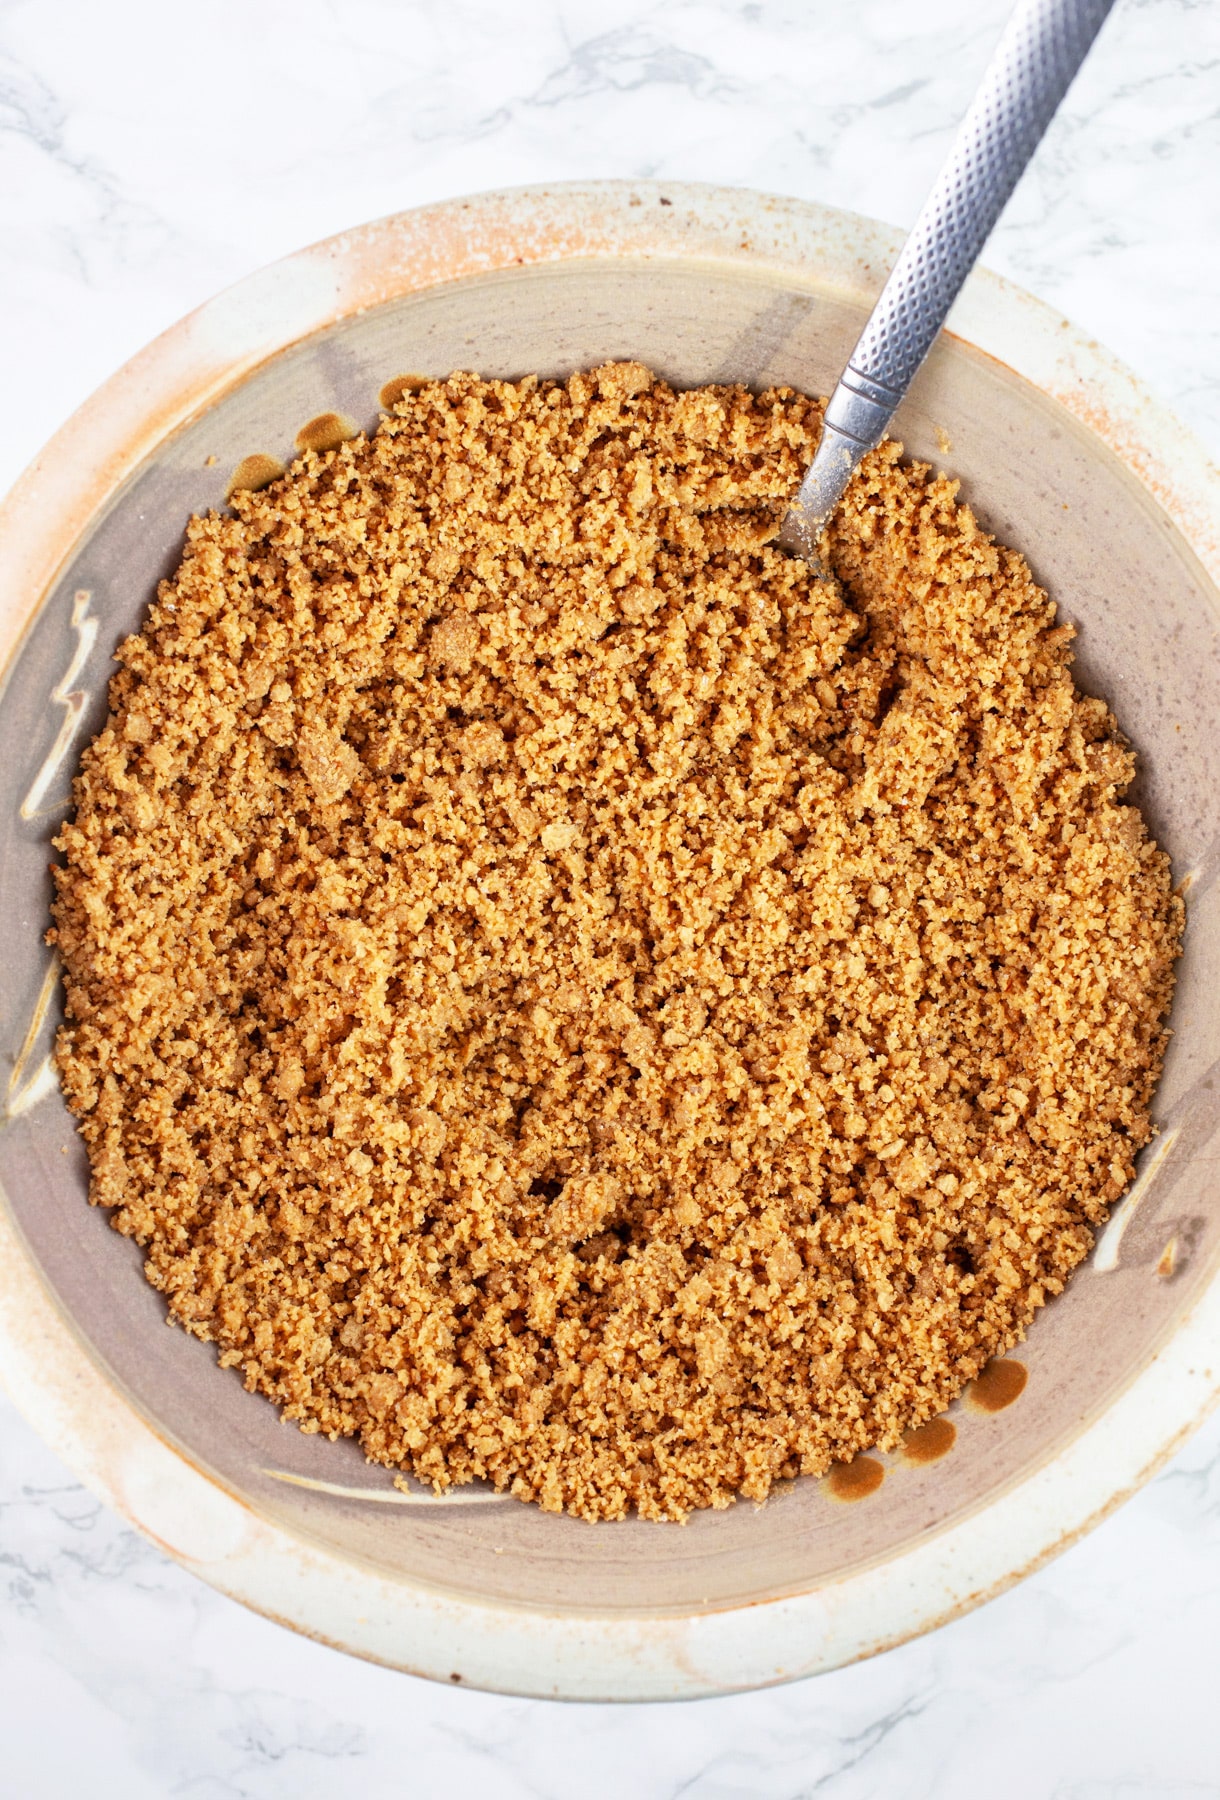
- Add 2 Tbsp. sugar and ¼ tsp. kosher salt. Stir the mixture until completely combined.
- Melt 6 Tbsp. of unsalted butter (or salted butter if that's what you have on hand) and drizzle it into the graham cracker mixture a bit at a time, stirring until combined. Continue until all of the butter is completely incorporated into the mixture.

Prepare The Graham Cracker Crusts
Once the graham cracker crust mixture is ready, it's time to place it into muffin tins lined with baking liners.
I recommend lining the muffin tins so that the cheesecake cups do not stick to the surface as they bake. The liners allow them to be removed from the muffin tins easily and helps to ensure that the graham cracker crust stays intact when removed.
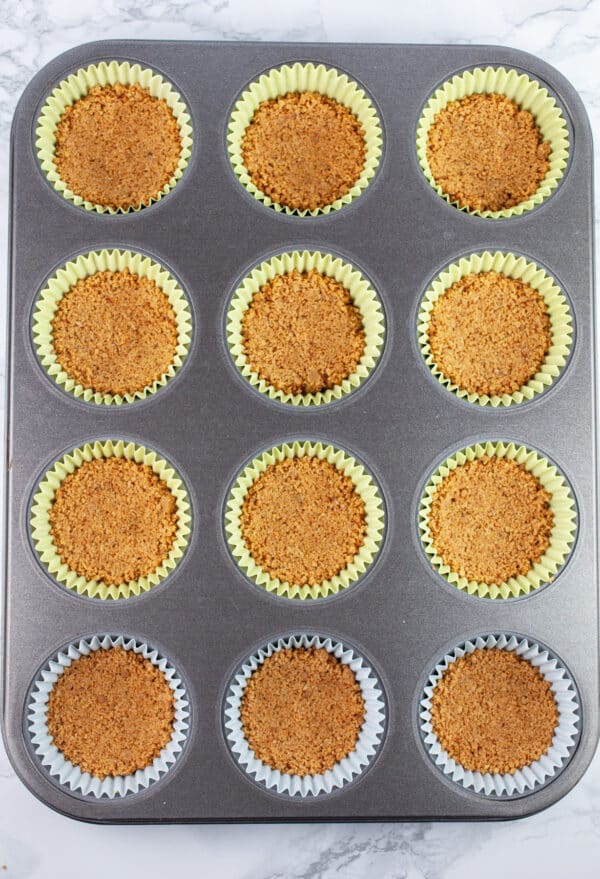
- Place a standard-sized baking liner into each cavity of 2 muffin pans (alternately, you can use 1 muffin pan if cutting this recipe in half).
- Spoon 3 Tbsp. of the graham cracker mixture into each muffin cavity.
- Press the graham cracker mixture down with the back of a spoon.
- Continue with the remainder of the graham cracker mixture, pressing it down to form a crust that will form the base that holds the filling.
There is no need to bake the graham cracker crust before adding the filling.

How To Make Peppermint Cheesecake Filling
The next step is to prepare the cheesecake filling. This peppermint cheesecake filling is easy to make and can be prepared using a stand mixer or an electric hand mixer.
When it comes to cheesecake, it's important that the ingredients used to make the filling are room temperature. This is especially true of the cream cheese.
Make sure to plan ahead and place the cream cheese and sour cream on the counter an hour or two prior to baking so that both can come to room temperature.
If the cream cheese is too cold, the cheesecake filling will be clumpy and unappealing. For the best results, I recommend bringing both the cream cheese and sour cream to room temperature (this means that it is soft to the touch).
It's best to use full fat cream cheese and sour cream instead of the low fat versions in order to achieve a rich and creamy cheesecake filling.
- Once the cream cheese and sour cream have reached room temperature, place the cream cheese into a mixing bowl and whip on medium speed using the whisk attachment of a stand mixer (you can also use an electric hand mixer) or until the cream cheese is light and fluffy.
- Add 1 cup of sour cream and whip on medium speed for another minute, or until combined.
- Add 4 eggs, ¾ cup sugar, and 2 tsp. of peppermint extract to the bowl. Whip on medium speed for another minute or two or until the mixture is completely combined.
- Scrape down the sides of the mixing bowl and whisk any remaining cream cheese into the mixture.
The cheesecake filling should be smooth, creamy, and easily pourable.
How Long Do Cheesecake Cups Take To Bake?
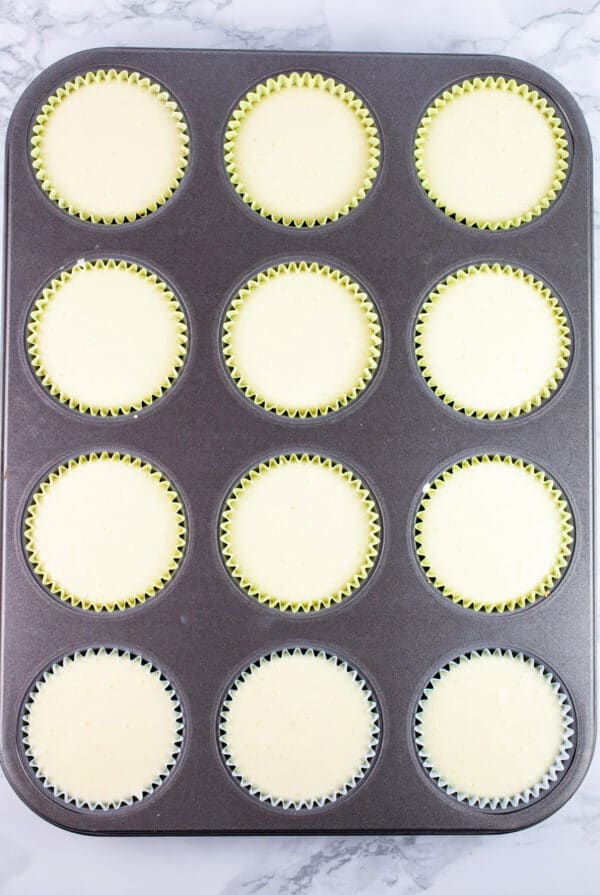
Once the filling is ready, it's added to the muffin tin on top of the prepared graham cracker crusts and baked in the oven.
These cheesecake cups take 20-22 minutes to bake at 350 degrees Fahrenheit.
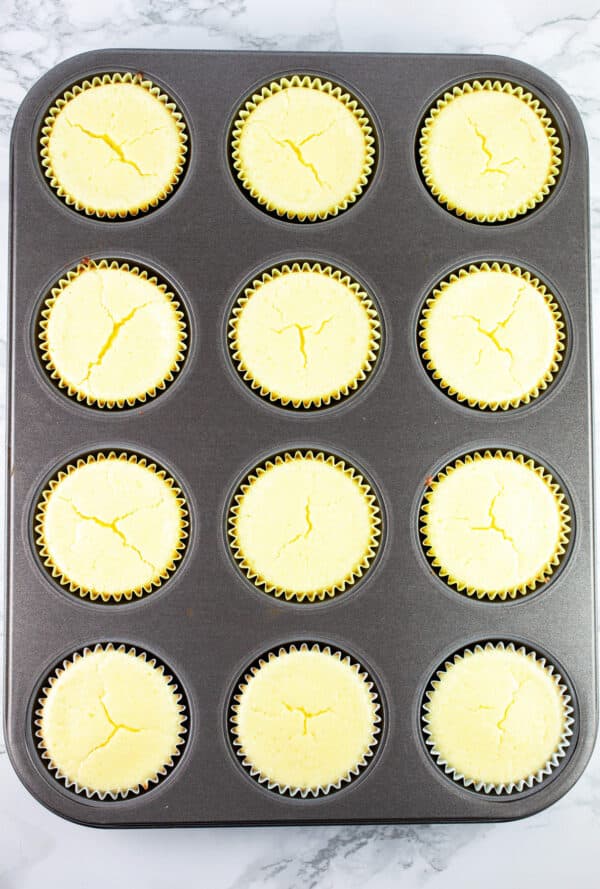
The cheesecake cups are baked just until the center is set. If you wiggle the pan after the cheesecakes are finished baking, their center should jiggle a bit. The filling should be firm enough to touch, but not completely hard.
The cheesecakes will continue to bake a bit even after removed from the oven.
They will likely puff up a bit while baking and then deflate. The top of the mini cheesecakes might crack, but this is not an issue as they are garnished with chocolate topping.
- Heat the oven to 350 degrees Fahrenheit.
- Spoon 3 Tbsp. of the cheesecake filling into each muffin tin.
- Continue with the remainder of the cheesecake filling, adding 3 Tbsp. to each muffin tin. Make sure the filling does not overflow the muffin cavities, or it will spill out as the cheesecake cups are baking.
- Place the muffin tins into the oven and bake for 20-22 minutes.
- Bake just until the center of each cheesecake cup is set.
- Remove the muffin tins from the oven and allow to cool completely.

How Long Do Cheesecake Cups Need To Cool?
Another thing to keep in mind is that cheesecake needs to cool before serving.
It's best to allow these cheesecake cups to cool for 1-2 hours before adding the toppings.
Cooling the cheesecake cups allows the graham cracker crust to set and the filling to solidify. If served while still warm, the crust would likely crumble and the filling will not have achieved the ultimate texture.
Cheesecake definitely needs to be cooled before its refrigerated, so make sure to allow it to cool completely before transferring to the refrigerator for storage.

How To Make Chocolate Ganache
One of my favorite things to top any dessert with is chocolate ganache.
Chocolate ganache is a decadent and not overly sweet sauce made with only 3 ingredients: Semi-sweet chocolate, heavy whipping cream, and instant coffee granules.
Actually, the instant coffee granules are optional, but adding it helps to bring out the flavor of the chocolate. This is a tip I learned from Ina Garten.
For the best results, I recommend preparing the chocolate ganache using a double boiler. The steam from the double boiler allows the ingredients to melt together slowly over soft heat and helps to prevent it from clumping up.
If you don't have a double boiler, you can use a sauce pan topped with a glass bowl.
- Place a few cups of water into the bottom portion of the double boiler and bring to a low boil.
- Place the top portion of the double boiler on top of the lightly boiling water and pour 1 cup of good quality chocolate chips into it.
- Once the chocolate begins to melt, slowly pour ¾ cup of heavy whipping cream into the pan, stirring with a small whisk (the mixture will look clumpy at first).
- Continue to stir until the mixture is smooth (this may take a minute or two).
- Add ¼ tsp. of instant coffee granules to the ganache and whisk until completely combined (this step is optional).
- Remove the top portion of the double boiler from the stove top, turn off the heat, and set aside.
How To Garnish Cheesecake Cups
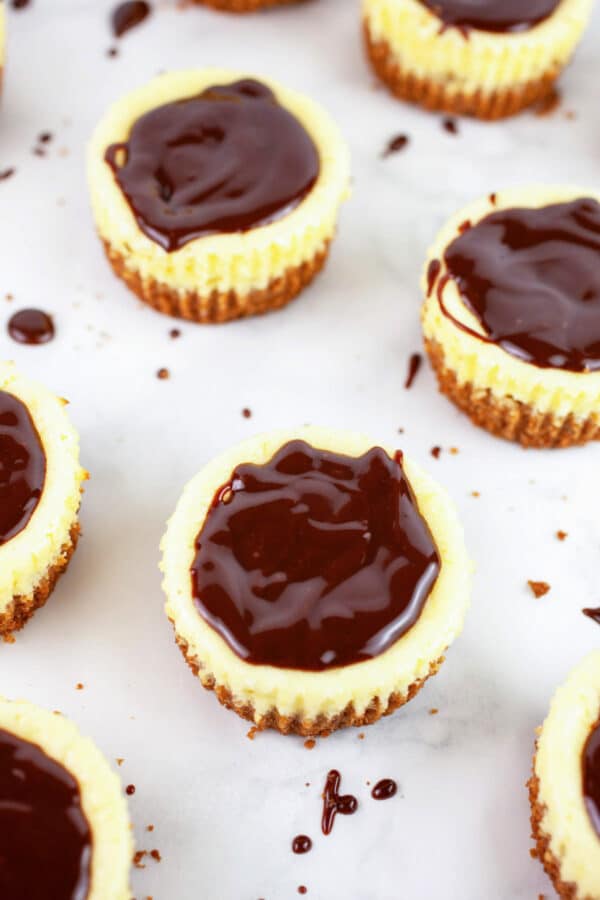
The only thing left is to top the cooled cheesecake cups with the chocolate ganache and sprinkle them with crushed peppermint candies.
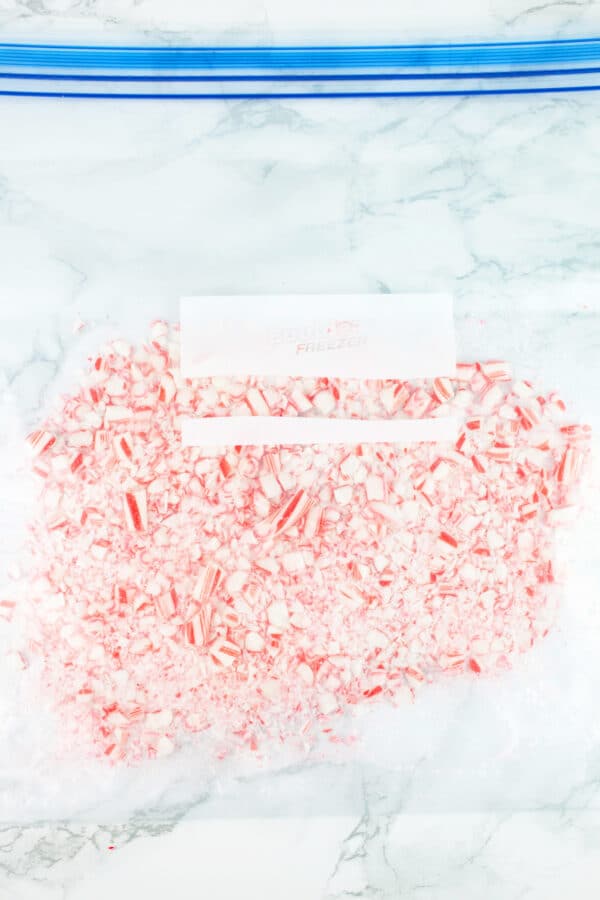
- To crush the peppermint candies, place 8-10 candy canes or peppermint rounds (make sure brand is gluten free if gluten is an issue for you) into a Ziploc bag.
- Using a rolling pin or meat tenderizer, tap the peppermint candies until they break into small pieces.
- Remove the cooled cheesecake cups from the baking liners and place onto a serving tray.
- Drizzle a generous amount of the chocolate ganache over the top of each one.
- Sprinkle desired amount of the crushed peppermint candies on top of the chocolate ganache.
Keep in mind that chocolate ganache does not become hard as it sits. It will harden slightly, but does not become hard like a chocolate shell.
What To Serve With Peppermint Cheesecake Bites
This is one of those great things that can be served alongside all of your favorite sweet and savory holiday bites.
They're delicious paired with savory snacks like spiced roasted mixed nuts, feta stuffed dates, gruyere prosciutto tartlets, and sweeter ones like these maple baklava tartlets or strawberry mascarpone tartlets.
They're great served with holiday drinks like champagne or this Tom and Jerry Christmas Cocktail, raspberry mule, whiskey Baileys affogato, pomegranate mojito, and cranberry ginger mocktail.
How Long Do Cheesecake Cups Last?
These Peppermint Cheesecake Cups last 2-3 days stored in an airtight container in the refrigerator.
Make sure to store them in the fridge as opposed to room temperature as they contain dairy.
Can They Be Frozen?
For the best taste and texture, I do not recommend freezing these cheesecake cups.
It's best to enjoy them right away or within a few days of making them.
I love these things (Literally. I had to give them away so I stopped eating them).
Love holiday desserts? Check out these recipes!
- Peppermint Shortbread Cookies
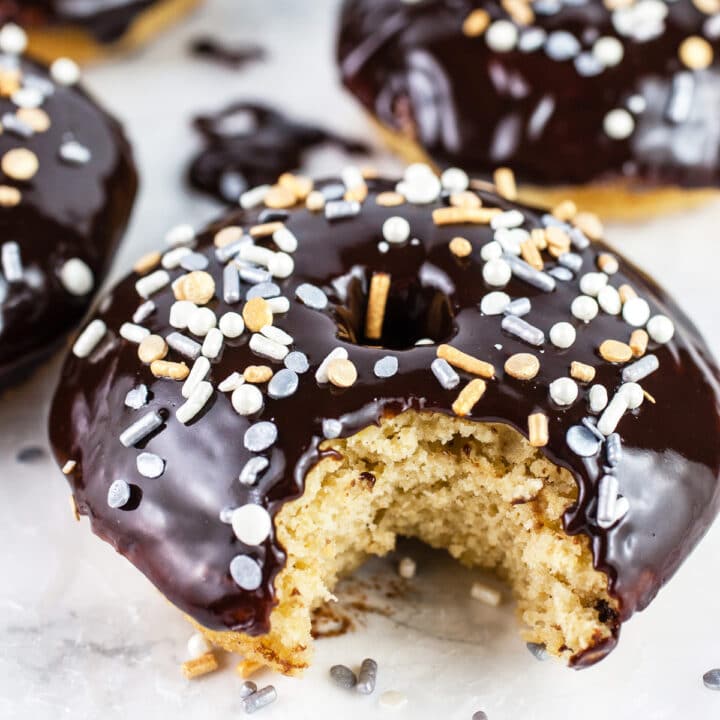
- Baileys Chocolate Doughnuts
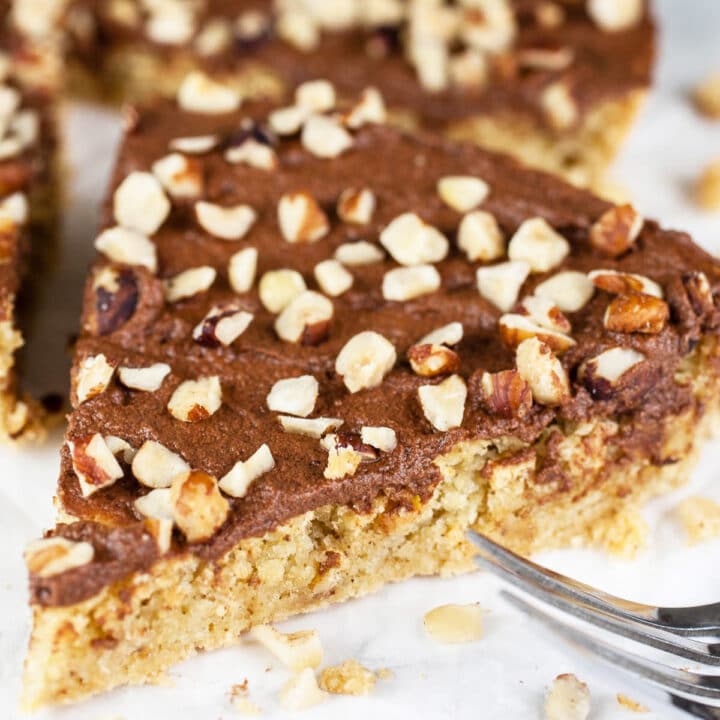
- Italian Chocolate Hazelnut Cake
- Pistachio Panna Cotta
- Crispy Sugar Cookies
- Peanut Butter Blossoms
- Chocolate Chip Coconut Cupcakes
Looking For More Peppermint Goodies? Don't miss these!
Peppermint Mocha Pudding
Peppermint Hot Chocolate
Dark Chocolate Mint Truffles
Peppermint S'more Magic Bars
Peppermint Cheesecake Cups
Equipment
- Stand Mixer or Electric Hand Mixer
Ingredients
For The Cheesecake Cups:
- 3 cups gluten free graham crackers crushed, or regular graham crackers if not gluten free
- 2 Tbsp. sugar
- ¼ tsp. kosher salt
- 6 Tbsp. unsalted butter can use salted butter
- 16 oz. cream cheese room temperature, equals 2 8 oz. packages
- 1 cup sour cream room temperature
- 4 eggs
- ¾ cup sugar
- 2 tsp. peppermint extract
- ½ cup peppermint candies crushed
For The Chocolate Ganache:
- 1 cup semisweet chocolate chips
- ¾ cup heavy whipping cream
- ¼ tsp. instant coffee optional
Instructions
For The Cheesecake Cups:
- Place 2 8 oz. packages of cream cheese and 1 container of sour cream on the counter and allow to come to room temperature (1-2 hours prior to baking).
- Heat the oven to 350 degrees Fahrenheit.
- To make the crust, place 11.5 oz. of gluten free graham crackers (or regular graham crackers if not gluten free) (this equals about 3 cups of graham crackers) into a food processor.
- Place the lid on the food processor and pulse the graham crackers until the texture resembles coarse crumbs. Pour the pulsed graham crackers into a large mixing bowl and add 2 Tbsp. sugar and ¼ tsp. kosher salt. Stir the mixture until completely combined.
- Melt 6 Tbsp. of unsalted butter (or salted butter if that's what you have on hand) and drizzle it into the graham cracker mixture a bit at a time, stirring until combined. Continue until all of the butter is completely incorporated into the mixture.
- Place a standard-sized baking liner into each cavity of 2 muffin pans (making for a total of 24 baking liners).
- Spoon 3 Tbsp. of the graham cracker mixture into each muffin cavity. Press the graham cracker mixture down with the back of a spoon. Continue with the remainder of the graham cracker mixture.
- Place the cream cheese into a mixing bowl and whip on medium speed using the whisk attachment of a stand mixer (you can also use an electric hand mixer) or until it's light and fluffy.
- Add 1 cup of sour cream and whip on medium speed for another minute, or until combined. Add 4 eggs, ¾ cup sugar, and 2 tsp. of peppermint extract to the bowl. Whip on medium speed for another minute or two or until the mixture is completely combined.
- Scrape down the sides of the mixing bowl and whisk any remaining cream cheese into the mixture.The cheesecake filling should be smooth, creamy, and easily pourable.
- Spoon 3 Tbsp. of the cheesecake filling into each muffin tin. Make sure the filling does not overflow the muffin cavities, or it will spill out as the cheesecake cups are baking.
- Place the muffin tins into the oven and bake for 20-22 minutes.Bake just until the center of each cheesecake cup is set. Remove the muffin tins from the oven and allow the cheesecake cups to cool completely (this takes 1-2 hours).
For The Chocolate Ganache:
- Place a few cups of water into the bottom portion of the double boiler and bring to a low boil. Place the top portion of the double boiler on top of the lightly boiling water and pour 1 cup of good quality chocolate chips into it.
- Once the chocolate begins to melt, slowly pour ¾ cup of heavy whipping cream into the pan, stirring with a small whisk (the mixture will look clumpy at first). Continue to stir until the mixture is smooth (this may take a minute or two).
- Add ¼ tsp. of instant coffee granules to the ganache and whisk until completely combined (this step is optional). Remove the top portion of the double boiler from the stove top, turn off the heat, and set aside.
- To crush the peppermint candies, place 8-10 candy canes or peppermint rounds (make sure brand is gluten free if gluten is an issue for you) into a Ziploc bag.Using a rolling pin or meat tenderizer, smash the peppermint candies until they break into small pieces.
- To Serve: Remove the cooled cheesecake cups from the baking liners and place onto a serving tray. Drizzle a generous amount of the chocolate ganache over the top of each one. Sprinkle desired amount of the crushed peppermint candies on top of each cheesecake cup.
Alyssa
Yum! So many favorite dessert flavors packed into these mini cheesecakes.
Christine
Thanks, Alyssa! They are pretty addicting. 🙂
Sara
These look so rich and flavorful! Thank you for sharing!
Christine
Thanks so much - They are very tasty!
Alexandra @ It's Not Complicated Recipes
Wow, three of my favourite things are included in the title of the dessert - of course I'm going to love it 😀
Christine
Thanks, Alexandra! These cheesecake cups are definitely addicting - I ate my fair share of them during the holidays! 🙂