
Learn How To Make Homemade Pizza Dough at home! This step by step guide will teach you how to make a dough recipe that works every time.
Follow this step-by-step guide and learn How To Make Homemade Pizza Dough that's perfect to use with all of your favorite toppings!

Homemade pizza dough is definitely one of those recipes that you want in your kitchen repertoire. It can seem kind of daunting, but in reality is very do-able!
Once you go start making your own pizza dough, you'll never go back to the pre-made stuff again. Pizza is so versatile - The amount and combination of pizza toppings is virtually endless.
Jump to:

How To Make Homemade Pizza Dough
Start with the yeast. Yeast is essential for the dough to rise and gives it the distinctive flavor that we all know and love.
- Combine 1 cup of warm water - It's really important that the water is warm and not hot - And 2 ¼ tsp. of jarred active dry yeast. This is equivalent to 1 packet of active dry yeast. Active dry yeast can be found in any grocery store in those little packages. I buy bulk yeast from a food coop and store it in the refrigerator but both of these will work equally well.
- Sprinkle 1 Tbsp. of sugar into the water and yeast mixture and let sit for at least 15 minutes. The mixture will get kind of 'bubbly' and form a little 'film' on top of the water.

Mix The Pizza Dough
After your yeast has proofed, you can add the rest of the ingredients. I like to use a Kitchen Aid mixer when making pizza dough because it makes the process much easier. You can kind of set it and forget it.
You can absolutely make pizza dough by hand, though! You will just need your hands to do the work that would otherwise be done with the machine. Kneading the crap out of pizza dough is a really good way to get your aggression out.
- Combine 2 ½ cups all-purpose flour, ¼ tsp. kosher salt, and the water/yeast mixture in a large bowl.
- Begin mixing these ingredients using the hook attachment.
- As it begins to mix, slowly add 1 Tbsp. of olive oil to the bowl. This will keep the dough from sticking to the side.

Let the mixer run on low for 6-8 minutes until all the ingredients have combined and the dough is kind of sticky, stiff, and elastic. It shouldn't be dry and clumpy at all.
If you prepare the dough manually, just work it with your hands until it reaches this consistency.

Allow The Dough To Rest
Scrape the dough off the hook and let it sit in a large bowl. You can rub a little more olive oil on the sides of the bowl to prevent it from sticking.
The mixture is kind of a dense lump at this point.

How Long Should Pizza Dough Rest?
Now all you have to do is place a wet towel on top of the bowl and let it sit for at least 30 minutes. Let it sit longer if you can.
The flavors will develop more the longer it sits. And place it in the warmest room in your house. This will help it rise faster.
I like to start my pizza dough a few hours beforehand so that it can rise nicely and develop some awesome flavor.

Voila. After you've waited for awhile, remove the towel and your pizza dough should have risen. It will at least double in size. Now your dough is ready to become pizza!
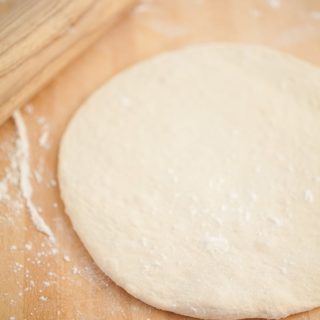
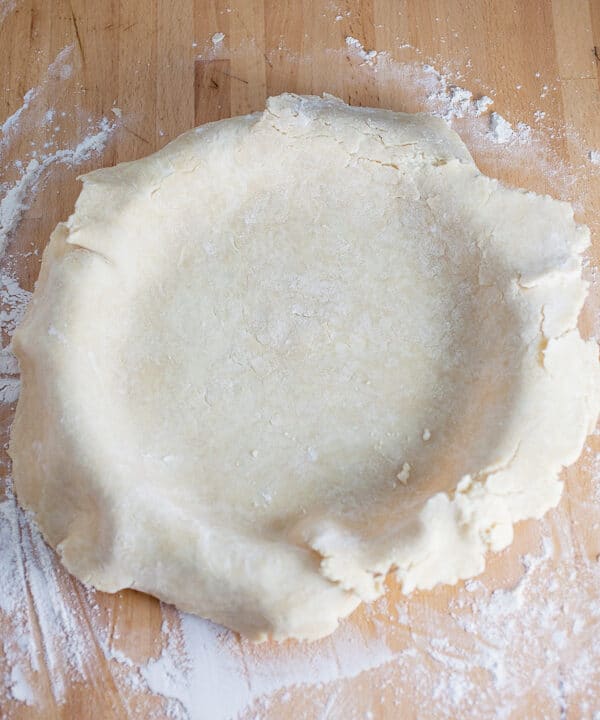
How To Roll Out Pizza Dough
Remove it from the bowl and cut it in half. This recipe makes two pizza crusts.
I find that it works well to prepare the dough on a smooth surface that has been sprinkled with flour.
Use your hands to smash the dough ball into a disc shape and then roll it out with a rolling pin. You can toss it into the air like you see in the movies, roll it out, smash it. Use whatever means necessary to get the shape you want.
Just remember that it doesn't need to look perfect!

Place the dough onto your favorite pizza pan and add your favorite toppings. You can sprinkle a little bit of cornmeal onto the pan before adding the dough to prevent it from sticking after it has baked, but this is optional.
After the pizza toppings are added, I bake it at 425 degrees Fahrenheit for 10-12 minutes. I discovered this recipe a few years ago and haven't looked back. Now you can make all kinds of tasty pizza recipes!
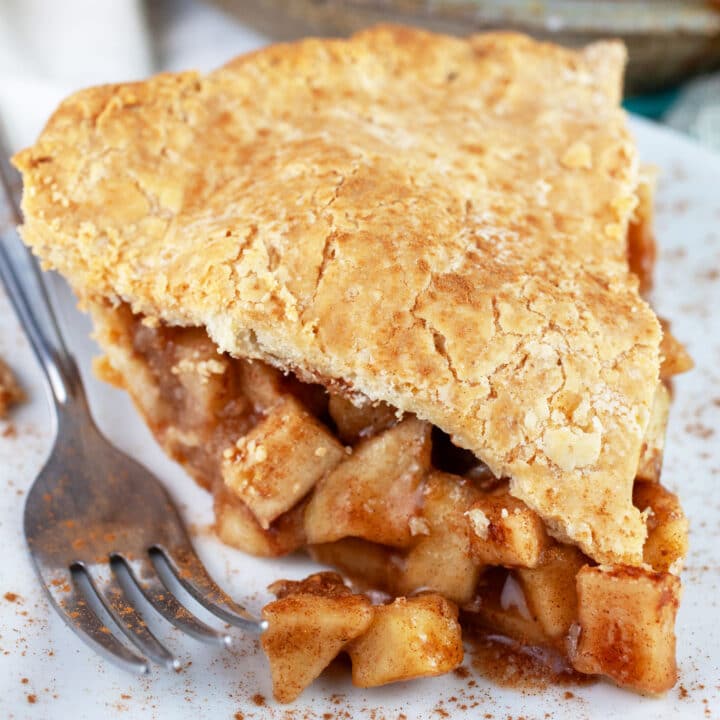
If you like to make homemade pizza crust, check out How To Make Homemade Pie Crust and How To Make Gluten Free Pie Crust!
Check out this recipe if you're looking for a Homemade Gluten Free Pizza Crust!
Love pizza? Check out these recipes!
- BBQ Chicken Pizza
- Mushroom Arugula Pizza
- Arugula Pesto Prosciutto Pizza
- Mediterranean Veggie Naan Pizza
- Sheet Pan Pizza
- Pizza Stuffed Peppers
- Chicken Pesto Flatbread Pizza
Looking For Pizza Recipes? Don't Miss These!
Bulgogi Korean Beef Pizza
Thai Chicken Pizza
Croque Madame Pizza
Homemade Pizza Dough (How To Make)
Equipment
- Stand Mixer optional
Ingredients
- 2 ¼ tsp. active dry yeast or 1 packet active dry yeast
- 1 cup warm water
- 1 Tbsp. sugar
- 2 ½ cups AP flour
- ¼ tsp. kosher salt
- 1 Tbsp. olive oil
- 1 Tbsp. cornmeal optional
Instructions
- Place 1 cup of warm (not hot) water and 2 ¼ tsp. jarred active dry yeast or 1 packet active dry yeast in small bowl. Add 1 Tbsp. of sugar to the bowl.
- Let sit for 15 minutes. The mixture will get bubbly and form a film on top of the water.
- In the bowl of a KitchenAid stand mixer (or a large bowl), add the water/yeast mixture to 2 ½ cups of AP flour and ¼ tsp. of kosher salt.
- Using the hook attachment, begin to mix the ingredients (or stir all of the ingredients with a wooden spoon).
- Slowly drizzle 1 Tbsp. olive oil into the bowl.
- Knead the dough for 6-8 minutes using the mixer or your hands.
- Scrape the dough off the hook, cover with a wet towel, and let sit for an hour in a warm room.
- Remove dough from bowl and divide in half.
- Flatten dough using hands and/or rolling pin.
- Sprinkle pizza pan with cornmeal (optional).
- Place flattened dough on pan and add favorite toppings.
- Bake at 425 degrees Fahrenheit for 10-12 minutes.
Brenda
This recipe is awesome, made it for the first time and was perfect.
Christine
So glad you enjoyed it and thank you for the feedback! 🙂
Kelly Asche
Chewy and delicious!
Amanda
Can it be made ahead and frozen?
Christine
Hi Amanda - I've never frozen this pizza dough but it should be totally fine! To freeze: Prepare the dough as written and then portion it out. Lightly spray each portion with olive oil, place the oiled dough in a freezer-safe bag, and freeze up to 3 months. When ready to use, place it in the fridge overnight to thaw and prepare as you normally would.
Hope that helps!
Lorie Bash
I have frozen this and it does well. This is my favorite recipe for pizza dough!!!
Christine
Hi Lorie - I'm so glad to hear that! Thank you for the feedback! 🙂
Barb Jackson
Somone please tell me the trick to rolling dough to shape! My dough shrinks back as soon as I remove rolling pin. no mattert what I do! What am I doing wrong? .
Christine
Hi Barb - You're not doing anything wrong! This is totally normal for pizza dough. You can be really rough with pizza dough - It needs to be rolled out a number of times before it thins out and holds its shape. Just keep rolling and feel free to use your hands to press it down as needed. 🙂
Amanda
To make four 10 inch pizzas, would doubling the recipe be enough?
Christine
Hi Amanda - That should work great! The recipe as written makes 2 12 inch pizzas so doubling it would be perfect for 4 10 inch pizzas. 🙂
Aura
Can you substitute wheat flour for all purpose flour
And if so how much?
Christine
Hi Aura - I have to honest - I've never made this pizza recipe with whole wheat flour but I know that it can be a bit tougher in texture. It might work to substitute half of the AP with whole wheat flour giving you a blend of both. You could try adding a little more water if necessary if it's too dry as well. Here is a great resource I found explaining how to properly substitute whole wheat flour: https://www.wikihow.com/Substitute-Whole-Wheat-Flour-for-White-Flour
I hope this helps and let me know how it goes! 🙂
MEgan Haislip
Some recipes want you to prebake the crust a little bit before adding toppings? Is this necessary for this recipe or does it work out fine? Some people were saying so the dough isn't soggy? Thanks!
Christine
Hi Megan - I have never pre-baked this pizza dough and found that it always turned out great. I think if you add ingredients that have a lot of moisture or add too many toppings pizza crust can get soggy and pre-baking it might help with that. If you don't overload it with toppings it should be totally fine. Let me know if you give it a try! 🙂
Aggie ruster
When you say let dough sit at least 30 min. At what point do I do that. After I roll it out or before I roll it out. Sorry, but I am confused.
Christine
Hi Aggie - No problem! Mix all of the ingredients until the dough forms a ball. Cover and let the ball of dough rest for at least 30 minutes. The dough will rise a bit as it rests. Once it has risen then roll it out, top, and bake. Hope that helps! 🙂
Jamie
This was fantastic! Even only resting for 30 min. I made a ounce batch - Can you store the leftover dough in the fridge?
Christine
Hi Jamie - So glad you enjoyed it! I've never tried storing leftover dough in the fridge but it looks like it's totally possible! It should be fine for a day or two stored in an airtight container. Maybe brush the insides of the container with oil before placing it in there so the dough doesn't stick to the sides. Then, let it sit for a bit at room temperature before rolling out. Hope that helps! 🙂
Linda
How would I freeze the dough when I make extra batches?
Christine
Hi Linda - Prepare the pizza dough as directed, allowing it to rise. Once it rises split it into two portions and form into two separate balls of dough. Lightly coat the outside of the pizza dough with olive oil and place each one into individual heavy-duty freezer bags (making sure to press any air out of the bags. They should be good in the freezer for up to 3 months. Here is a great article with photos on freezing pizza dough: https://www.thekitchn.com/how-to-freeze-pizza-dough-178431 Hope this helps! 🙂
April
Absolutely loved this recipe, thank you so much for sharing!
Christine
Hi April - So glad you enjoyed it and thank you for the feedback! 🙂
Nick
If I double the batch and still split in 2 would that make 2 14 or 16 inch pizzas?
Christine
Hi Nick - The recipe as written yields 2 14 inch pizzas. If doubling the recipe, it should yield 4 14 inch pizzas.